
How to Choose a Shuttle Rotomolding Machine?

Choosing a Shuttle Rotomolding Machine is a practical decision, not a showroom exercise. The right model must match product size, mold weight, material, cycle time, and factory space. A machine that looks powerful may still waste energy or limit future production.

Dr. Roy Crawford, a recognized authority in rotational molding technology, stated, “Machine selection should follow the product and process, not prestige.” This principle remains useful when comparing shuttle systems. Measure the largest mold carefully. Check arm reach, oven clearance, cooling capacity, and loading access. A mold may fit on paper but become difficult to remove beside a hot oven. Small details matter.

Review the machine’s heating method, temperature control, indexing accuracy, and cooling arrangement. Ask whether the supplier can provide cycle data from a similar product. Request service records, spare-part availability, and operator training. These details reveal more than a polished brochure. Energy consumption also deserves attention. An efficient oven can reduce operating costs during long production runs.

Do not select capacity only for today’s orders. Allow reasonable room for product development, but avoid buying oversized equipment without a clear plan. That mistake is common. The choice is rarely perfect.

A reliable evaluation should include factory inspection, test molding, safety documentation, and written performance terms. Compare total ownership cost, not only the purchase price. Experienced manufacturers will explain limitations openly. If a supplier promises every result without testing, pause and ask harder questions. This guide will help buyers assess each Shuttle Rotomolding Machine with clearer expectations and fewer expensive surprises.
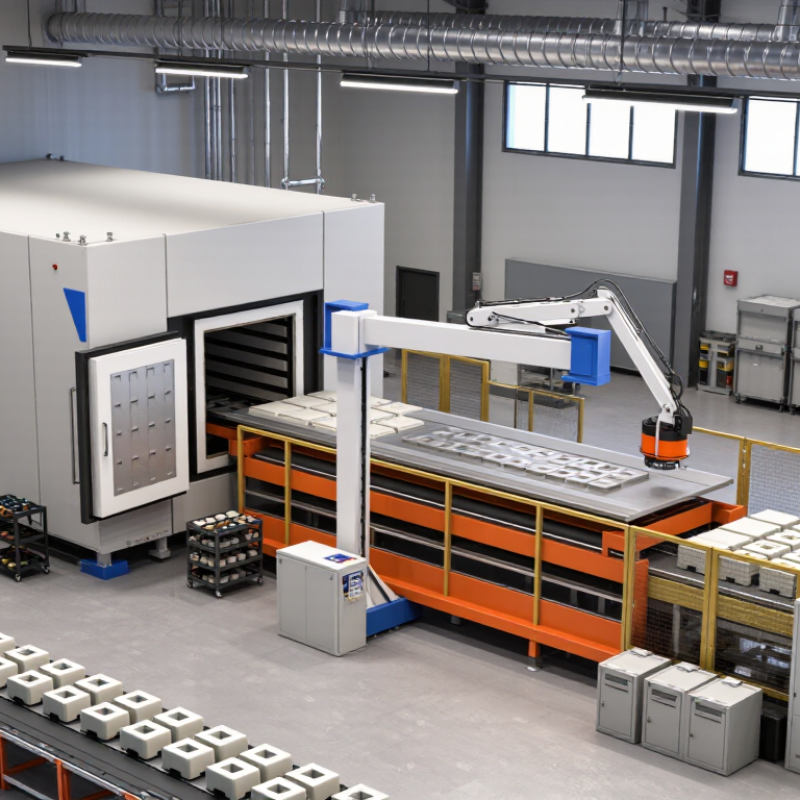
How to Choose a Shuttle Rotomolding Machine?

Define the Production Requirements for Shuttle Rotomolding

When choosing a shuttle rotomolding machine, define the production target before comparing machine features. Record the part’s length, width, height, weight, and wall thickness. Include mold weight, not only product weight. A 1,200-millimeter tank may need a larger swing radius than expected. Measure the loading area and aisle. Space matters. Note the resin type, color changes, and annual volume. These details establish the heating chamber size, arm capacity, and suitable station arrangement.

Map the real cycle, from mold loading to cooling and demolding. A cycle lasting 45 minutes can produce fewer parts than expected. Test heating time with the actual mold and resin. Track oven temperature, energy use, cooling airflow, and operator movements. If one station waits while the other cools, the machine is oversized in one area and limited in another. Shuttle equipment should match your bottleneck, not impress your purchasing team.

Plan for quality and dependable maintenance. Define temperature recording, alarm limits, mold access, guarding, and emergency stops with qualified engineers. Ask whether technicians can reach burners, drives, sensors, and control panels safely. Keep spare heating and control components available. I have seen output plans fail because cooling space was ignored. That mistake is easy to repeat. Leave room for future molds, but do not pay for idle capacity. Review the figures with operators before approval.


How to Choose a Shuttle Rotomolding Machine?

Define the production requirements before selecting machine size, oven capacity, and shuttle configuration.

The chart shows the theoretical number of molding cycles available in a 24-hour period at different cycle times. Values are calculated as 1,440 minutes divided by the total cycle time. In actual production, output is lower because of loading, unloading, cooling, mold changes, maintenance, and material handling. Use your required daily output and actual cycle time to determine the appropriate shuttle machine capacity.

Compare Machine Capacity, Mold Size, and Shuttle Configuration

Choosing a shuttle rotomolding machine starts with capacity, not price. Grand View Research’s 2024 rotational molding report projects steady market growth through 2030, driven by larger tanks, containers, and infrastructure parts. This trend makes future payload planning important.

Check the machine’s rated load, oven volume, and maximum mold envelope together. A mold measuring 2.4 meters wide may fit physically, yet fail when the arm rotates through the oven. Leave clearance for vents, clamps, and thermal expansion. Also compare usable payload with the mold’s steel weight and resin charge. Oversizing the machine can increase energy consumption and slow heating. Undersizing creates longer cycles and mechanical stress.

Mold size matters most.

Shuttle configuration affects productivity. Single-shuttle systems suit varied production and frequent mold changes. Dual-shuttle designs can support overlapping loading, unloading, and heating activities, but only when controls and operator routines are well coordinated.

Review arm travel, shuttle spacing, oven access, and independent rotation speeds. A 2023 report from the Association of Rotational Molders highlights process control and cycle consistency as major quality concerns across rotational molding operations.

The Plastics Industry Association also reported more than 112 billion pounds of plastics processed in the United States in 2022, showing the scale of the wider sector, though rotational molding represents only a small portion.

One practical warning: selecting capacity from the largest planned mold can be misleading. Recheck production forecasts, average mold occupancy, and peak seasonal demand. The “perfect” configuration may still waste floor space.

Evaluate Heating, Cooling, and Energy Efficiency

How to Choose a Shuttle Rotomolding Machine?

Evaluate Heating, Cooling, and Energy Efficiency

A shuttle rotomolding machine should heat molds evenly, not merely reach a high oven temperature. Ask for temperature records from several points inside the oven. Uneven airflow can leave thick corners undercured while thin walls become overheated. That defect may appear only after trimming, which makes it costly to diagnose. Check burner response, insulation quality, and temperature recovery after each shuttle movement. A practical factory trial is more useful than a brochure specification.

Cooling performance directly affects cycle time and part quality. Review airflow volume, water temperature, spray coverage, and mold access during cooling. Strong cooling is not always better. Rapid temperature changes can create warping, internal stress, or uneven shrinkage. Measure the mold surface at several locations. Shorter cooling time matters only when the finished part remains stable.

No test is perfect. Energy efficiency needs real operating data. Request electricity or fuel consumption per cycle, not just motor ratings. Compare kWh or fuel use against part weight and output. Efficient insulation reduces heat loss around doors, seals, and oven panels. Variable-speed fans can reduce power during lower-demand stages. Keep records for several weeks, because one clean demonstration cycle can mislead. I have seen teams focus on peak heating speed and overlook idle losses. That decision looked efficient initially, but daily production exposed the weakness. Examine maintenance access too; dirty filters and worn seals quietly increase energy use.

Check Automation, Safety Features, and Maintenance Access

How to Choose a Shuttle Rotomolding Machine?

Choosing a shuttle rotomolding machine starts with automation, not brochure claims. Watch the shuttle move during a complete production cycle. A reliable system should control heating, cooling, indexing, and mold rotation consistently. Ask whether operators can store recipes and adjust approved settings safely. Data logging matters. It can reveal temperature drift before uneven wall thickness becomes a customer complaint. During a factory visit, request a sample cycle with your actual mold and resin. That test is more useful than a polished demonstration. I would also check how easily operators understand alarms, screen messages, and manual controls.

Safety features should be visible, testable, and easy to understand. Look for guarded moving zones, emergency stops, interlocked doors, and clear status signals. Check whether controls prevent an unsafe restart after power loss. A good operator should not lean across a hot oven. Maintenance access deserves equal attention. Inspect access doors, platforms, grease points, filters, heating components, and electrical panels. Can technicians reach them with ordinary tools? If every inspection needs a ladder or a long shutdown, costs will grow quietly. Leave enough space around the machine for cleaning and repairs. In practice, small access problems become repeated production delays. No machine is perfect. Document weak points before purchasing, and confirm service intervals, training, spare-part availability, and risk assessment records in writing.

Assess Supplier Support, Total Cost, and Long-Term Value

How to Choose a Shuttle Rotomolding Machine?

A shuttle rotomolding machine should be judged beyond its purchase price. PlasticsEurope’s Plastics—The Fast Facts 2024 reports global plastic production reached 413.8 million tonnes in 2023. This scale increases pressure for stable cycles, lower waste, and dependable output. Ask suppliers for commissioning records, operator training, spare-parts availability, and response times. A polished demonstration is useful, but service evidence matters more.

Total cost includes energy, labor, mold changes, maintenance, rejected parts, and production downtime. The U.S. Department of Energy reports that motor-driven systems consume about 70% of industrial electricity. Therefore, compare burner efficiency, drive controls, insulation, and recovery features using measured data. Request a five-year cost model with realistic operating hours. A spreadsheet can lie if downtime is ignored. I have seen a cheaper machine become expensive after repeated delays and unavailable components.

Tips: Check cycle repeatability with your own mold. Request references from similar factories. Inspect the control interface before purchase. Confirm warranty exclusions in writing. Ask whether technicians can support your location remotely and on site. Do not accept vague promises. Long-term value depends on usable training, documented maintenance, upgrade options, and honest communication. One weakness remains: future energy prices are difficult to predict, so leave room for efficiency improvements.

How to Choose a Shuttle Rotomolding Machine? — Assess Supplier Support, Total Cost, and Long-Term Value

Evaluation Dimension Practical Benchmark Why It Matters Recommended Verification Suggested Weight
Machine Configuration Two independent shuttle stations with separate mold-loading and heating positions Allows loading, unloading, cooling, and heating activities to overlap, improving utilization. Review the machine layout, station travel path, interlocks, and maximum mold envelope. 10%
Usable Mold Capacity Select the platen and oven size from the largest planned mold, including clamps, vents, and clearance. An undersized work envelope restricts future products; excessive size increases energy and capital cost. Submit a dimensioned mold drawing and request a written confirmation of usable length, width, and height. 10%
Heating and Temperature Control Independent burner or electric-zone control, closed-loop temperature monitoring, and recipe storage. Consistent heating affects wall thickness, warpage, cycle time, and scrap rate. Request temperature uniformity data, thermocouple locations, control accuracy, and sample production results. 12%
Automation and Process Records PLC-based controls with recipe management, alarm history, cycle records, and user access levels. Recorded process data supports repeatability, troubleshooting, audits, and operator training. Confirm data export options, backup procedures, remote diagnostics, and cybersecurity responsibilities. 8%
Installation and Commissioning Defined scope covering delivery, positioning, utility connection, calibration, trial production, and operator training. Unclear installation responsibilities can cause schedule delays and unexpected site costs. Require a responsibility matrix, commissioning checklist, acceptance criteria, and training hours. 10%
Warranty Coverage A clearly defined parts and labor warranty, commonly covering at least 12 months after commissioning or 18 months after shipment. The warranty period and exclusions directly affect early ownership risk. Check coverage for heaters, drives, controls, sensors, labor, travel, and consequential damage. 8%
Technical Support Response Named support contacts, documented escalation routes, and remote troubleshooting during operating hours. Fast diagnosis can reduce downtime when a control, drive, sensor, or burner fault stops production. Request service-level targets for initial response, remote diagnosis, and on-site attendance. 12%
Spare Parts Availability Critical electrical, heating, motion, and safety components supported for the expected service life. Long lead times for proprietary parts can create extended production interruptions. Obtain a recommended two-year spare-parts list, typical lead times, interchangeability details, and obsolescence policy. 10%
Energy Consumption Compare measured energy per cycle or per finished part rather than heater nameplate power alone. Heating efficiency, insulation, cycle duration, and cooling practice materially affect operating cost. Request test conditions, utility assumptions, batch size, cycle time, and measured kWh or fuel usage. 10%
Maintenance and Serviceability Accessible components, lubrication points, preventive-maintenance schedules, and standard industrial components where practical. Simple maintenance lowers labor cost and improves equipment availability over time. Review maintenance intervals, replacement procedures, access clearances, and required technician skills. 8%
Total Cost of Ownership Evaluate purchase price, freight, installation, utilities, labor, maintenance, spare parts, downtime, and expected residual value. The lowest purchase price may not provide the lowest cost per acceptable part. Build a five- to ten-year TCO model using the same production volume and utility assumptions for every quotation. 12%
Cost comparison guidance: Use a consistent model that includes equipment price, shipping, installation, utilities, labor, planned maintenance, spare parts, downtime risk, and expected service life. Actual costs vary with machine size, automation level, energy source, production volume, local labor rates, and site requirements.
Go to Top